A clean fuel-dispensing filter is not merely a courtesy; it is a small, pivotal guardrail for smooth meter operation and fuel integrity. Dirt, scale, and stray pump-lube particles take liberty with the mesh once attention wanes, eventually choking flow and straining internals. The following pages outline the job in manageable pieces, from power-down to rinse-off, so even first-timers feel steady. Station hands, maintenance techs, or the conscientious owner-operator alike can bracket off half a shift and bring the pump back to fighting trim. Regular service is far cheaper and calmer than emergency repair.
How Often Should You Clean a Fuel Dispenser Filter?

Maintenance cadence hinges on product purity, dispenser workload, and the local weather that sweeps dust or salt into the fill line. A rough benchmark puts filter inspection every six months or thereabouts after 100,000 gallons cycled, whichever shows up sooner. Those numbers slide under steady, alkaline fuel or in a howl of coastal sand. Consult the OEM pamphlet for model-specific talk, then pencil the date where it cannot be forgotten.
What are the signs of a clogged filter?
Fuel-dispensing equipment seldom keeps quiet when its filters become choked; the warning bells arrive in unmistakable bursts. Operators frequently notice that the nozzle slows to a reluctant drip, a telltale sign that the membranes are pinched tight around the fuel line. That molasses-like crawl seldom lasts long before pressure gauges swing violently between high and low, and even ordinary hand pressure on the trigger feels jittery or uneven.
Loose bits rustling inside a clogged filter dont simply vanish; they bleed into the product stream and create a grocery list of problems. Tiny flecks, unexpected cloudiness, or a gritty dust at the bottom of a collection cup do more than hint at trouble; they announce that the media has quit filtering and has become part of the fuel mixture. Most modern pumps are wired to scream for help long before anything catastrophic happens, and those built-in alarms are worth their weight in gold. Industry surveys peg the efficiency hit at nearly 30 percent once the passage narrows to a crawl, another compelling reason to read those gauges early and often.
Routine check-ups matter, not just for the corporate balance sheet but for goodwill with every motorist who expects a smooth fill-up—spotting the first signs of a sluggish flow or a quiet tremor in the pressure needle can spare equipment headaches and customer complaints.
How does regular cleaning impact the fuel system?
The fuel system needs to be cleaned with a certain periodicity to lengthen the machinery’s wear life and maintain its performance efficiency. Accumulating harmful impurities like dust, slush, and other debris in the fuel system causes issues in which the fuel moves to the engine, and the system’s performance drops. The research indicates that clear fuel systems can decrease fuel consumption by up to 10 % and reduce emissions, benefiting the environment and the economy. Such systems are also beneficial as they decrease the burden on pieces like the fuel injector and pump, reducing the chances of costly maintenance or repair. To avoid breakdowns, fuel system cleaning schedules help because they do not allow any malfunction, which means that it’s a preventive maintenance strategy that must be implemented when dealing with safe and efficient fuel fill-up methods, for example, in automobiles.
What happens if you neglect to clean the filter?
Failing to maintain a filter in good condition means severe problems affecting performance, health, and safety. As the filter accumulates over time, the fuel or air flow diminishes, thereby overstressing the system. As a result, there will be a loss in efficiency, an increase in fuel consumption, and the whole system might fail in severe cases. For instance, the fuel filter, if contaminated, can cause the car engine to stall or fire incorrectly, or be challenging to accelerate due to the presence of dirt that obstructs the fuel discharge completely. Latest research on engine function has revealed that a clogged air filter can decrease the fuel economy by as much as 10% and depress the engine output by 9%. Moreover, dirty filters enhance the likelihood of quick machine breakdowns by promoting faster deterioration of the machine parts, leading to high maintenance or related services expenses. Failure to maintain could negatively affect safety, especially where engines of particular equipment or systems need precision operation, thus reducing the probability of breakdown or accident management. It also raises the operational costs and further mitigates the use of the particular system. Proper care calls for periodic cleaning and replacement to counteract the effects of these hazards and ensure the durability and efficiency of the system in the long run.
What Tools are Needed to Clean a Fuel Dispenser Filter?
Special tools must be acquired to service a fuel dispensing machine suction filter. These tools are a socket set or a spanner to separate a filtering element from a housing, a clean towel to eliminate dirt, a cleaning agent deemed necessary by the company and effective for cleaning fuel system components, and an extra fuel filter in case the installed filter becomes dirty or spoils. One should also use protective goggles and gloves to avoid contamination by fuel during the cleanup procedure.
How to use a cleaning solution effectively?
Following the basic protocol, using a cleaning solution on a dispenser filter is straightforward.
Identify a Cleaner: Depending on the filter’s material, choose a product that will not corrode metal or plastic. Non-corrosive and biodegradable options are safe bets for most applications.
Mix the Liquid: Follow the dilution ratio printed on the bottle. Many formulations suggest a 10-to-1 mix, ten parts water to one part cleaner, but verifying that number before proceeding is necessary.
Rinse First: Flush the filter briefly under warm water to remove loose dirt and dust. A quick pre-rinse exposes stubborn deposits to the agent rather than letting them remain fixed.
Apply the Cleaner: Submerge the component in the diluted solution, or mist the liquid onto every exposed surface with a spray head. If grease or caked dust is present, leave the cleaner to dwell for five to ten minutes.
Scrub Lightly: Reach for a soft-bristle brush or synthetic pad; steel wool is a poor choice. Gentle scrubbing is usually enough to lift residue without scouring the filter itself.
Rinse Thoroughly: After scrubbing the filter, run a generous stream of fresh water through the media so no cleaner remains. Any trace of detergent can attack the filter material or introduce unwanted chemicals into the fuel stream.
Inspect the Filter: Once dry, hold the element to the light and look for grit still caught in the pores or cracks that might have opened during use. A filter that still harbors residue or exhibits visible wear is a candidate for immediate replacement.
Safe Disposal of Cleaning Residue: Collect the spent cleaning fluid in a sealed container and dispose of it at a hazardous waste facility, or follow the disposal rules stipulated by the local authority. Improper dumping can pollute soil and water.
Experience shows that periodic, correct cleaning can stretch a filter’s life by fifty percent while keeping dispensers trouble-free. Choosing the right solvent and rinsing thoroughly protects equipment and the environment in one step.
Which wrench is best for the job?
Selecting the proper wrench for a project is rarely straightforward; the exact application almost always dictates the tool. A single adjustable wrench is often favored when standard household or shop tasks arise because the jaw spacing can be tweaked to fit nearly any exposed nut. However, a mechanic with tighter quarters or a critical bolt may grab a combination wrench with little hesitation; the dual profiles- open end and box-end- confer both torque and clearance in one tool.
Demanding environments- projects involving rusted pipe, industrial frames, or heavy automotive rebuilds- call for sturdier implements. A pipe wrench, mated with toothed jaws that bite into curved stock, secures tubing that would otherwise twist under hand pressure, for fasteners whose integrity hinges on precise rotation, a torque wrench, whether beam style or a newer digital readout version, confirms that the user lands precisely on the specified Newton-meters or foot-pounds.
Tool longevity and reliability remain moot if the alloy fails halfway through a job. Chrome-vanadium steel resists both chipping and surface rust, qualities much appreciated by users who operate near salt water, hydraulic fluid, or plain grit. Instruments stamped with ANSI grading carry a history of calibration and inspection that shortcuts guesswork at the point of purchase.
Can a screwdriver help in the disassembly process?
A quality screwdriver remains a cornerstone in any disassembly job, mainly because it delivers the precise torque a screw demands. Picking the right blade shape- whether Phillips, Torx, or flat-head- keeps the fastener intact and saves the surrounding material from unintended gouges.
Hand tools still dominate many workbenches, but electric and torque-controlled models have cropped up everywhere from smartphone repair to automotive overhaul. Tests show the powered version can shave almost 30 percent off the dismount time, a clear edge when every minute counts. Magnetic tips, too, have proven handy; they cradle stubborn screws that otherwise vanish into an appliance’s guts.
Recent prototypes boast rubberized, slip-resistant handles that cushion sustained grip. Meanwhile, chrome-vanadium steel shafts resist bending, so the same tool survives a weekend hobbyist project and a factory production line. These upgrades explain why the screwdriver refuses to yield its place on the toolkit shortlist even in the age of composites and robotics.
Step-by-Step Guide to Cleaning a Fuel Dispenser Filter
Deactivate the Power Circuit: First, cut the power to the fuel dispenser. Flick the main switch and double-check that every electrical circuit has been locked. Safety is never an afterthought.
Bleed Off System Pressure: Next, bleed pressure from the fuel line according to the manufacturer-specified procedure. This small chore stops gasoline from spraying when you finally crack open the filter cover.
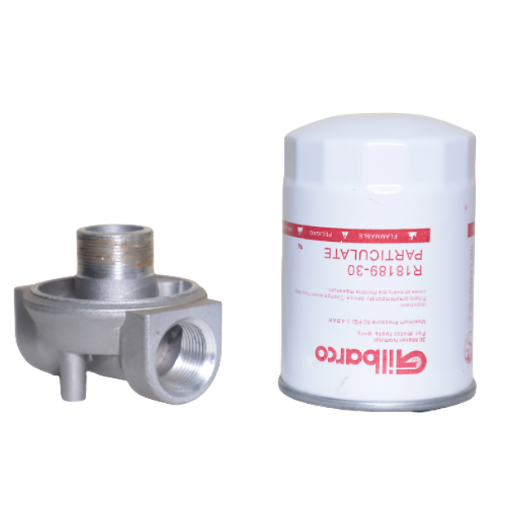
Find the Filter Housing: Scan the equipment bay for the round filter housing. It usually sits close to the fuel pump or tucked inside the dispenser’s steel cabinet. A glance through the service manual can save you a fruitless search.
Loosen the Housing Cover: Grab the proper wrench or socket and loosen the cap that seals the housing. Expect a trickle of residual fuel; most dispensers never hold every last drop.
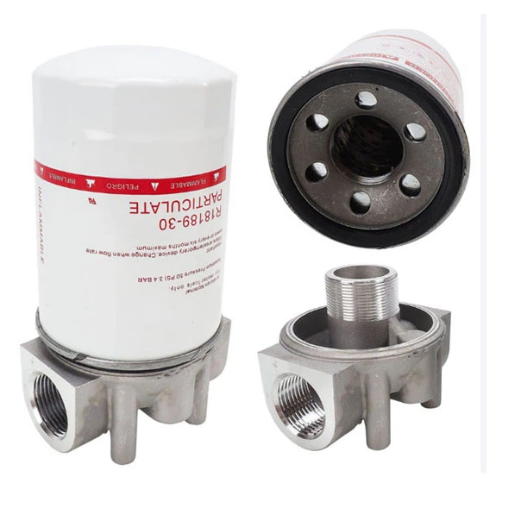
Extract the Cartridge: Pull the spent filter out and examine the element for ash, metal shavings, or other severe contamination. A minute of inspection can glimpse the product’s overall health as it moves through the system.
Wipe Inside the Housing: Run a fresh, lint-free rag inside the bowl to mop up dust or sludge that may have settled. Leaving even a speck of grit behind invites trouble the moment a new cartridge is slid in place.
Install the New Filter: Slide the replacement filter into the housing, carefully examining the orientation specified in the manufacturer’s literature. A second look at the seal ensures fuel will not escape when the system is back under pressure.
Secure the Filter Housing Cap: Affix the cap over the filter assembly and tighten it to the torque value in the service manual. Overtorquing can crack the housing, so a steady hand is wiser than a heavy elbow.
Restore Pressure to the System: Reintroduce pressure to the line in the staged manner outlined in the equipment instructions. Scan the base of the housing for wisps of fuel that signal an undetected leak.
Turn On the Power Supply: Re-energize the fuel dispenser and run a brief test cycle to verify the flow is smooth and uninterrupted. Listen for any abnormal sounds that might hint at internal irregularities.
Routine upkeep-filter changes, cleaning screens, and similar tasks keep the dispenser agile, curbs contamination, and stretches the service life of costly components. Always default to the specific instruction booklet that accompanies each dispenser, since the devil of safety often hides in the machine’s unique details.
How to safely disconnect the fuel pump?
Disconnecting the fuel pump takes only three steps: pump it out, remove it, and use a lift – I took care of the other half of the board. Applicable drawings and standard tools are required for replacement. Carefully remove all components from the engine to access the faulty part. Then, 1. Disconnect the radiator hose 2. Remove the engine mounts, yes/no, and complete the other items.
What is the best way to drain residual fuel?
It is crucial to focus on and execute the effective draining of residual fuel systematically to prevent any threat to safety and effectiveness. First and foremost, working in a well-ventilated area is helpful as the goal is to avoid the inhalation of gases and limit the extent of danger from fire. Start by ensuring the vehicle is parked, the machine is turned off, and the battery is disconnected to prevent possible shorting. Check with the manufacturer’s instructions on accessing the fuel tank or system to work more autonomously.
Using a siphon pump is one of the most efficient and safest ways to drain the fuel. Siphon pumps of good quality help transfer fuel in a controlled manner and have features that help prevent leakages. The pump material must be selected to sustain gasoline, chemicals, and other fuel sources. According to research, it has been proven that introducing a current non-corrosive style of hand siphon units with an anti-backflow feature can reduce the amount of fuel wasted by up to 15% and clean them more thoroughly.
If there is a self-draining tank on the vehicle, remove the bottom screw and carefully place it in the correct container for gas. Make sure it is a container that is actually made for fuel and also that it is marked as such. If there is still some fuel in the lines or the filters, then the use of compressed air serves as a great help in ensuring the system is completely water-clear. Lastly, always ensure that the drained fuel is disposed of or stored according to the local environmental and safety regulations so as not to cause any pollution and harm. Provided these procedures are well understood and the right instruments are applied, most dangers inherent in the practice that are not quite manageable shall be subdued or mitigated during the fuel deployment.
How do you remove the fuel filter element?
Removing a vehicle’s fuel filter element is a task that admits no shortcuts. One careless twist can damage the lines or contaminate the tank, so the step-by-step method matters.
Prepare the Workspace and Gather Tools: Park on a level stretch, switch off the engine, and let everything cool. Assemble a clean wrench set, a drain pan, fresh rags, gloves, and goggles. Many technicians also keep an operator manual handy to verify any model-specific adapters.
Depressurize the Fuel Circuit: Fuel system pressure can exceed 50 psi, so safety comes first. Pinpoint the fuel pump relay or inline fuse in the electrical box and lift it out. Turn the ignition key long enough for the engine to sputter, proving the pressure has vanished. Disconnect the battery ground before touching any lines.
Find the Filter Element: Filters appear in different spots- frame rails, engine bays, even inside fuel modules- so locating the unit is a precondition. The owner’s manual or a repair guide provides the most precise roadmap.
Drain Residual Fuel: Position a clean drain pan beneath the fuel filter to collect any liquid that spills upon disconnection. Even a few ounces of gasoline or diesel on a hot surface can ignite in seconds, so proceed with clear, steady caution.
Disconnect Fuel Lines: Locate the fuel lines attached to the filter body. Depending on the manufacturer’s design, they may be quick-connect couplings, threaded ends, or traditional hose clamps; use the correct tool to unfasten each fitting. Before removing the lines, mark the filter’s flow direction so the replacement can be oriented correctly.
Remove the Fuel Filter Element: Engage a torque or strap wrench, whichever suits the filter size, and slowly break loose the filter from its bracket. Observe the exact method of securing bolts, brackets, or retainers, because the new element must be installed similarly.
Inspect Components: With the old filter off, examine the surrounding hoses, hard lines, and the mounting face for cracks, leaks, or corrosion. Replace any compromised component to guarantee a tight seal and reliable service once the fresh filter is in place.
Dispose of the Old Fuel Filter Properly: A spent fuel filter holds rancid gasoline and minute debris, making it hazardous to the landscape if discarded carelessly. Most community hazardous-waste programs or neighborhood auto-parts counters will accept the cartridge and contain its spillage.
A deliberate step-by-step approach guarantees the canister comes free without twisting or snagging. Vehicle service manuals remain the best compass for model-specific quirks because fuel-line layouts differ more than many motorists imagine.
Can You Clean and Reuse a Fuel Dispenser Filter?

No, a fuel dispenser filter cannot and must not be cleaned. They are disposable items and should be discarded once they cease functioning due to dirt or other impurities. Trying to clean fuel dispenser filters could cause the filter’s media to break, and its safety would be at risk while in the system. The most optimal approach is to substitute the old assembly with the new one to ensure flawless performance and avoid harm that may be done to the fuel dispenser or other connected equipment.
What are the benefits of cleaning and reusing the fuel dispenser filter?
Cleaning a fuel-dispenser filter may appear economical on the surface, but reliable data and field experience show that the downside dwarfs the upside. A refurbished element can still grab some rust or dirt for a little while, yet its gradual loss of permeability often permits larger particles to break loose and reach sensitive nozzles. Even a single oversight can fracture the screening material, turning what felt like a penny saved into hundreds of dollars lost. Most engineers, therefore, advocate installing a fresh cartridge, citing that practice as the simplest insurance policy for ongoing system health.
When should you consider replacing the fuel dispenser filter with a new one?
Obvious symptoms- slower flow, erratic volume delivery, or visible strain on the pump- leave little room for hesitation regarding filter swaps. Scheduled outages scheduled according to the supplier’s hours of operation in dispense cycles remain the safest benchmark. Still, field teams should react even faster whenever free water or sludge climbs beyond the defined visible limit. Timely replacements spare costly damage, protect product quality, and, perhaps most importantly, keep end-users from encountering sputtering pumps when they fuel up.
How can I check if the fuel dispenser filter is damaged or contaminated?
A fuel-dispenser filter that is damaged or fouled often announces itself through lower-than-normal flow rates or an erratic volume readout on the nozzle. Those irregularities can serve as an early warning that passages within the filter media have started to close off. When the housing is unbolted, the technician should look for visible particles, rust-colored streaks, or pools of water clinging to the filter element. Routine service visits also supply a chance to gauge performance against the intervals specified in the equipment manual; any sharp deviation from the baseline usually warrants further investigation. If the product leaving the nozzle appears gritty or takes on a strange tint, the cartridge is almost certainly compromised and should be swapped out immediately.
What are the Best Practices for Maintaining a Fuel Filter?
To keep efficient fuel filters, you ought to refer to your car’s or machine’s manufacturer’s manual, model characteristics, or those of the equipment. Such a fuel filter inspection should be conducted if there is any evidence of blockage, dirt, or pipes. In some cases, such a filter repair shall be carried out frequently, the mileage of which travel distance has already been defined, the hours the device has been turned on, etc. This is because most filters have some operating hours that are suitable for their operation. Always purchase compatible filters within your system’s suggested limits/dimensions. Moreover, the practice will ensure the purity of the used fuel because impure fuel acts like dirty oil, which may shorten life. These measures will thus help maintain your air system’s efficiency and life.
How to prevent debris buildup?
To keep your system in good working order and to prevent it from wearing prematurely, taking steps to avoid the accumulation of dirt in the system is a priority. The first line of defense is periodic system maintenance – ensure the system is always kept clean and crucial parts such as the air filter, fuel filter, and so on, are inspected and, if necessary, replaced. It is suggested that the air filters be visually inspected every 12,000 to 15,000 miles, depending on each vehicle. In contrast, other factory filters may ask for different replacement cycles depending on the hours of operation.
In addition, the appropriate management of materials also plays a crucial role in reducing the introduction of pollutants. Consider the protection of fuel from contamination and that of the facility. People must carefully handle fuel in the open, for it will accumulate. Sometimes, exposure to dust, water, soil, and other unwanted particles can be poisonous. Although the intake systems mainly incorporate screens or protective grilles, other solutions with their applications have been developed to prevent large garbage from accumulating within the system.
Also, effective dust prevention and cleanliness keep the environment around the plant clean, improving the containment of unwanted substances. It has been proven that equipment such as air purifiers or dust collectors can remove almost 90% of the dust in the air of industrial facilities.
The last advice on diminishing dirt is always to use additives or detergents to reduce the buildup of smaller particles in the machine’s operation. Such sustained awareness and safeguarding practices will aid in managing debris buildup and curtail potential complications in the future.
What role does regular maintenance play?
Regular Care is critical in Preserving Health, Work Quality, and Occupational Safety.
The energy saving of integrally refurbished units reaches 25-30%. For instance, if an air conditioning system unit uses maintenance practices of changing the filter and cleaning the evaporator and adiabatic dry coil section of the air handling unit, there will be an additional energy savings on this system as one will be able to reduce the air pressure across this system as much as 15%. Also, it is helpful because this maintenance prevents dysfunction from occurring and thus avoids breakdown costs, including preventative control, which can cover 50% of overall future costs caused by breakdowns in the equipment.
Maintenance inspections performed regularly within industrial and corporate facilities guarantee longer life for equipment at times when wear and tear is still manageable. Besides, a safe and secure work environment can also be ensured, as all the employees present will not endure energy or even personal injuries related to system malfunctions, such as overheating or machines collapsing in the building. Establishments must adhere to maintenance programs to maximize production, save resources, and guarantee the employees and customers a safe working place.
How can you extend the lifespan of the filter?
To improve filter durability, one must adopt positive upkeep and Maintenance Techniques. For instance, it is essential to check that the filter is altered or cleaned at intervals in accordance with the manufacturer’s recommendation. The best practices are like cleaning HVAC filters every three months or even less to prevent clogs due to dirt accumulation.
Cleaning the area around the filter to remove dust particles and debris helps minimize the filter pressure drop, improving the filter’s performance.
The next best thing is ensuring the working conditions are acceptable and making adjustments where necessary. For instance, if some equipment, caused by filter blockage, is operating with inadequate flow, this is possible to damage the filter. By compressing the filter further or increasing the fluid flow rates, it is also known that the filter’s lifespan can be significantly reduced. Furthermore, the availability of pre-filters, which can remove larger particles, means that primary filters can last longer.
Lastly, the lens and the procedural summary must be attended to to distinguish whether any repair work is needed. Malfunctions that can develop when full-scale can be alleviated if some special care is taken on time, therefore saving hours, days, or even months that would otherwise be lost when fitting a new one. Such skills contribute to maintaining maintenance costs in terms of replacement and ensure improved first-time efficacy of such systems, such as filtration systems.
Reference Sources
1. Evaluation & Function of Fuel Dispensing Filtration for Gasoline & Ethanol Blended Motor Fuels
2. To Overcome the First Disadvantage in the Fight against Global Climate Change
3. Design and Fabrication of Shoe/Slippers Sanitizing Ramp
Frequently Asked Questions (FAQs)
Q: Why is it important to clean a fuel dispenser filter?
A: Cleaning a fuel dispenser filter ensures efficient fuel flow and prevents dirt and debris from clogging the system. This can lead to poor engine performance or damage, especially in sensitive components like the carburetor and injection systems.
Q: How often should the fuel pump filter be cleaned?
A: The cleaning frequency depends on the vehicle type and the fuel used. Generally, it’s recommended to check and clean the filter every 12,000 to 15,000 miles or during regular maintenance, particularly for diesel engines, which may accumulate more gunk.
Q: What tools do I need to clean a fuel dispenser filter?
A: Basic tools include a wrench to remove the filter housing, a clean jar to catch fuel spillage, and a clean cloth or brush to dislodge dirt and debris from the filter. If the old o-ring is worn or damaged, you may also need a new one.
Q: How do I remove the fuel pump filter?
A: To remove the filter, ensure the engine is off and cool. Locate the filter on the side of the fuel pump or near the fuel tank outlet. Carefully disconnect the fuel lines and remove any screws or clamps holding the filter in place. Gently pull the filter out for cleaning.
Q: What is the process for cleaning the fuel dispenser filter?
A: After removing the filter, tap it lightly to dislodge loose debris. Soak the filter in a suitable cleaning solution to remove stubborn gunk if necessary. After washing, back-flush the filter with clean fuel to remove any remaining debris. Let the filter air dry completely before reinstalling.
Q: Can I clean or replace a replaceable inline filter?
A: While some inline filters are designed to be replaceable, others may be cleaned effectively with proper maintenance. If the filter is excessively dirty or damaged, it’s advisable to replace it to ensure optimal performance.
Q: What should I do if I notice fume or fuel leakage after cleaning?
A: If there is a fume or fuel leak, check all connections and seals, particularly the o-ring, for proper fit. Ensure all components are reinstalled correctly. If the problem persists, further troubleshooting may be needed to identify and fix any underlying issues.
Q: Is it necessary to back-flush the fuel filter, and how is it done?
A: Back flushing can be beneficial to remove dirt and debris that normal flow might not dislodge. To back flush, reverse the fuel flow direction through the filter using clean fuel. This process helps clear out any remaining particles.
Q: Are there any specific precautions to take when cleaning a fuel filter in diesel engines?
A: Yes, take extra care to ensure no air enters the fuel system, as this can cause starting issues. After reinstalling the filter, prime the system to avoid air pockets affecting the engine’s performance.