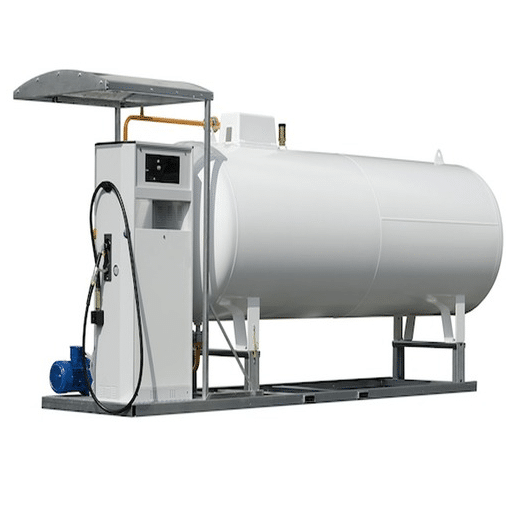
Over 581,000 underground storage tank releases have been confirmed across the United States alone, according to the EPA’s UST program data. Roughly 54,000 contaminated sites still need cleanup, with the average remediation cost reaching $154,000 per site. Those numbers tell a clear story: underground fuel tank removal is not something to delay or improvise.
If you own, operate, or manage a property with aging underground storage tanks (USTs), the risks of inaction go beyond regulatory fines. Leaking tanks contaminate soil and groundwater, drive property values down, and create liabilities that can follow you for decades. The good news is that proper decommissioning, done correctly, eliminates these risks and opens the door to safer, more efficient fuel storage infrastructure.
This guide covers every phase of the underground fuel tank removal process, from initial assessment and permitting through excavation, contamination testing, site restoration, and replacement tank selection. Whether you manage a commercial gas station, an industrial depot, or a residential property with a buried heating oil tank, you will find practical steps and cost data to plan your project with confidence.
Ready to explore your replacement options before or after a tank removal project? Contact our engineering team for a consultation on compliant, double-wall storage tank solutions.
What Is Underground Fuel Tank Decommissioning?

Underground fuel tank decommissioning is the regulated process of permanently closing an underground storage tank system so it no longer stores fuel or other hazardous substances. The goal is to eliminate environmental risk, satisfy regulatory requirements, and restore the site for continued or future use.
It helps to understand three related but distinct terms:
- Permanent closure refers to the complete shutdown and removal (or filling) of a UST system, including all piping and ancillary equipment. Federal regulations under 40 CFR Part 280, Subpart G define the specific requirements.
- Temporary closure means the tank is taken out of service but remains in the ground with the intent to resume use. Owners must still maintain corrosion protection and release detection during temporary closure.
- Change-in-service applies when a regulated UST is converted to store a non-regulated substance. The same emptying, cleaning, and site assessment steps apply.
Decommissioning matters for three reasons. First, it protects soil and groundwater from contamination. Second, it keeps your operation in compliance with federal and state regulations. Third, it eliminates ongoing financial liability tied to aging infrastructure. For a broader overview of tank lifecycle management, see our complete guide to underground fuel storage tanks.
When Should You Decommission an Underground Fuel Tank?
Not every aging tank demands immediate removal, but several clear triggers should prompt action. The EPA identifies these criteria for decommissioning:
- Tank integrity failure. If inspections or tightness testing reveal cracks, corrosion breaches, or structural weakening, the tank should be decommissioned before a release occurs.
- End of service life. Most steel USTs have a design life of 20 to 30 years. Tanks that have exceeded this window carry elevated corrosion and leak risks.
- Discontinuation of use. When a facility closes, changes operations, or no longer needs fuel storage, the tank must be permanently closed.
- Regulatory mandates. Some jurisdictions set firm deadlines. California, for example, required all single-wall USTs to be removed or replaced by December 31, 2025, with penalties of 500 to 5,000 per day per tank per violation starting January 1, 2026.
- Substance incompatibility. Tanks designed for one product type may not safely store a different substance, triggering a closure requirement.
Beyond these formal triggers, watch for warning signs like persistent failed leak detection tests, visible corrosion on accessible components, or unexplained product loss. If your tank lacks cathodic protection or has no secondary containment, the risk profile is significantly higher.
Consider what happened at a fuel depot in the U.S. Midwest in early 2025. The operator had delayed removing three 30-year-old single-wall steel tanks, reasoning that they were “still holding product.” During a routine compliance inspection, soil sampling around the tank bed revealed petroleum concentrations well above state action levels. What should have been a $75,000 planned removal turned into a $340,000 remediation project, plus 14 months of groundwater monitoring. The lesson: proactive decommissioning is almost always cheaper than reactive cleanup.
UST Removal vs. Abandonment in Place
When the time comes to decommission, you face two primary methods: complete removal or abandonment in place (also called in-situ decommissioning). Each has legitimate applications, and the right choice depends on site conditions, regulations, and long-term plans.
Complete Removal
Complete removal means physically extracting the tank, all connected piping, and associated components from the ground. This is the most thorough approach and the one most regulators prefer.
Advantages:
- Eliminates all underground liability
- Allows full contamination assessment of the tank cavity
- Provides maximum flexibility for future land use
- Satisfies the strictest regulatory requirements
Drawbacks:
- Higher upfront cost
- Requires heavy equipment and site disruption
- Takes longer to complete
Abandonment in Place (In-Situ Decommissioning)
When physical removal is impractical, such as when a tank sits beneath a building, under active utility lines, or where excavation would compromise structural foundations, abandonment in place is the alternative. The tank is emptied, cleaned, and filled with an inert material.
Common filling methods include concrete slurry, sand, or foam resin. Foam resin is increasingly preferred because it allows future removal if circumstances change, unlike concrete, which makes extraction nearly impossible.
Advantages:
- Lower cost and less site disruption
- Avoids structural risk when tanks are beneath buildings
Drawbacks:
- The tank remains underground
- Contamination assessment is limited to accessible areas
- Future liability may persist depending on jurisdiction
- Some lenders and insurers view abandoned tanks unfavorably
Side-by-Side Comparison
| Factor | Complete Removal | Abandonment in Place |
|---|---|---|
| Cost | 15,000−30,000+ (commercial) | 600−3,400 (residential); lower for commercial |
| Environmental certainty | Highest, full cavity access | Moderate, limited assessment area |
| Regulatory preference | Preferred in most jurisdictions | Conditional, requires approval |
| Future land use flexibility | Full | Limited |
| Contamination assessment | Complete (walls and floor sampling) | Partial |
| Future removal option | N/A (already removed) | Possible with foam; difficult with concrete |
Planning a decommissioning project? Request a quote for certified replacement tanks that meet current double-wall and secondary containment standards.
Step-by-Step Underground Fuel Tank Removal Process

The underground fuel tank removal process follows a structured sequence. Skipping or shortcutting any step can create regulatory violations, safety hazards, or hidden environmental problems. Here is what each phase involves.
Step 1: Pre-Removal Assessment and Permitting
Before any equipment reaches the site, you need a clear picture of what you are dealing with. This starts with reviewing tank records (age, construction, contents, maintenance history) and progressing to a Phase I Environmental Site Assessment if one has not been completed recently.
Ground-penetrating radar or other geophysical surveys help confirm the tank’s exact location, dimensions, and proximity to utilities. In many states, you must submit a removal notification to your regulatory agency at least 30 days before the planned work date. Permits from local fire departments and building departments are often required as well.
Step 2: Site Preparation and Safety Setup
The contractor establishes a safety perimeter, stages equipment, and marks all underground utilities (gas, water, electric, sewer). Road signs and barriers direct traffic away from the work area if the site is near public roads.
Safety planning is critical. UST removal involves flammable vapors, heavy machinery, and potential exposure to contaminated soil. Worker protection includes personal protective equipment (PPE), atmospheric monitoring devices, and clearly documented emergency procedures.
Step 3: Tank Emptying and Cleaning
All remaining fuel is pumped out and disposed of through a licensed waste hauler. After the liquid contents are removed, the tank interior is cleaned to remove accumulated sludge, scale, and residual product. This step generates hazardous waste that must be handled according to local and federal disposal requirements.
Step 4: Inerting the Tank
Even after cleaning, flammable vapors can linger inside the tank and create explosion risks during cutting or excavation. To neutralize this hazard, contractors fill the tank with an inert gas, typically carbon dioxide (introduced via dry ice) or nitrogen. Atmospheric monitoring confirms that oxygen levels and vapor concentrations are within safe working limits before physical work begins.
A facility manager in West Africa learned this the hard way when a crew attempted to cut into an improperly purged fuel tank during a 2024 decommissioning project. The resulting flash fire injured two workers and delayed the project by six weeks. Proper inerting is never optional.
Step 5: Excavation and Physical Removal
With the tank safely purged, the excavation begins. Backhoes or excavators carefully remove soil from around and above the tank. All connected piping, vent lines, and fill ports are disconnected and removed.
The tank is secured with chains or rigging straps and lifted from the cavity. Larger tanks (10,000 gallons and above) may require a crane. Concrete anchors and saddles holding the tank in place must be broken and removed. The extracted tank is transported to an authorized facility for recycling or disposal.
For guidance on what comes after removal, our underground fuel tank installation guide covers site preparation and placement of new tanks.
Step 6: Confirmation Soil Sampling and Contamination Assessment
This is the step that determines whether your project stays on budget or escalates significantly. Once the tank is out, soil samples are collected from the excavation walls and floor at prescribed intervals. These samples are sent to an accredited laboratory for analysis of petroleum compounds such as benzene, toluene, ethylbenzene, and xylenes (BTEX), plus total petroleum hydrocarbons (TPH).
If results come back below state action levels, you have a “clean closure.” If contamination is detected, the situation shifts to a confirmed release, triggering mandatory reporting and additional investigation. Groundwater monitoring wells may need to be installed to map the contamination plume, adding 15,000 to 30,000 or more in assessment costs alone.
Step 7: Backfill, Compaction, and Site Restoration
For clean closures, the excavation is filled with approved clean fill material and compacted in lifts to prevent future settling. Compaction testing verifies that the backfill meets engineering specifications. Surface restoration, whether asphalt, concrete, or soil, returns the site to its pre-excavation condition.
Step 8: Documentation and Regulatory Reporting
The closure report documents every phase of the project: tank condition, cleaning procedures, inerting records, soil sample results, disposal manifests, and backfill specifications. In most jurisdictions, a licensed Professional Engineer (PE) or Professional Geologist (PG) must stamp the report. The EPA notification form (Form 7530-1) is submitted, and all records are retained as required by 40 CFR 280.74.
Regulatory Requirements for Underground Fuel Tank Removal

Underground fuel tank removal in the United States falls under federal regulations defined in 40 CFR Part 280, Subpart G (Sections 280.70 through 280.74). These rules apply to UST systems that were in use on or after December 22, 1998.
The key federal requirements include:
- Notification to the implementing agency at least 30 days before closure
- Emptying and cleaning the tank by removing all liquids and accumulated sludge
- Site assessment to determine whether releases have occurred (Section 280.72)
- Recordkeeping demonstrating compliance with closure requirements (Section 280.74)
- Following approved industry procedures such as API Recommended Practice 1604 (“Closure of Underground Petroleum Storage Tanks”) and API Standard 2015 (“Safe Entry and Cleaning of Petroleum Storage Tanks”)
States and territories serve as the primary implementing agencies and often add requirements beyond the federal baseline. California, for instance, set the December 31, 2025 deadline for single-wall UST removal. Other states may require specific contractor licensing, additional soil sampling protocols, or financial assurance documentation.
For operations outside the United States, regulatory frameworks vary by region. In the European Union, member states implement the Environmental Liability Directive, which holds operators responsible for preventing and remediating environmental damage. Countries across the Middle East, Southeast Asia, and Africa typically reference international standards such as API, NFPA, and ISO for tank closure procedures, though local enforcement varies. Understanding UST compliance requirements in your jurisdiction is essential before starting any decommissioning work.
Underground Fuel Tank Removal Costs
Cost is often the first question for any decommissioning project, and the answer depends heavily on tank size, location, and whether contamination is present.
Cost Breakdown by Scenario
| Scenario | Estimated Cost Range |
|---|---|
| Residential tank removal (single, 275-1,000 gal) | 900−3,600 |
| Residential tank beneath a structure | 4,000−6,000 |
| Abandonment in place (residential) | 600−3,400 |
| Commercial single tank, clean closure | 15,000−30,000 |
| Multi-tank gas station removal | 50,000−300,000+ |
| Soil remediation (if contaminated) | 2,500−17,000 (average) |
| Extensive contamination cleanup | 20,000−1,000,000+ |
The EPA estimates the average cleanup cost at $154,000 per contaminated site. For commercial operators, the takeaway is clear: the potential cost of contamination dwarfs the cost of proactive removal. For a full cost breakdown including worked examples, read our dedicated guide to underground fuel tank cost and TCO.
What Drives Cost Variation?
Several factors influence the final bill:
- Tank size and quantity. A single 1,000-gallon residential tank is far less complex than a cluster of 20,000-gallon commercial tanks.
- Contamination. A clean closure might cost $20,000 for a commercial tank. Discovering contamination can triple or quadruple that figure.
- Site access. Tight urban lots require smaller equipment and more manual labor. Rural sites with open access are generally less expensive.
- Local regulations. States with more stringent sampling requirements or permit fees add to the baseline cost.
- Disposal costs. Contaminated soil disposal is priced by the ton and varies regionally.
When comparing contractor bids, verify that each includes permitting, vapor purging, piping removal, the number of soil samples, backfill and compaction, surface restoration, and the closure report.
How Tank Design Affects Removal Complexity
Not all tanks create equal problems at end of life. The original construction and material choices significantly influence how complex and costly the decommissioning process becomes.
Single-wall steel tanks are the most problematic. Without a secondary containment barrier, any corrosion breach allows product to reach surrounding soil directly. These tanks are responsible for the majority of confirmed UST releases and the most expensive cleanup projects.
Double-wall tanks incorporate a secondary barrier that captures leaks before they reach the environment. The interstitial space between the two walls can be monitored continuously, meaning leaks are detected early and contained. When these tanks are eventually decommissioned, the probability of encountering soil contamination is dramatically lower. To understand the differences in detail, see our comparison of double-wall vs. single-wall fuel tanks.
SF double-layer construction, which combines fiberglass reinforcement with steel for enhanced corrosion resistance and structural integrity, pushes reliability even further. Tanks built with SF double-wall technology resist the pitting and perforation that plague conventional single-wall steel over time.
The practical lesson is straightforward: investing in higher-quality tank construction at the point of purchase directly reduces end-of-life decommissioning costs. A tank that prevents leaks over its entire service life can be cleanly removed at a fraction of the cost of remediating a contaminated single-wall installation.
Choosing a Replacement Tank After Removal

Tank removal and replacement often happen as a single project. If your facility still requires fuel storage, selecting the right replacement tank is just as important as removing the old one correctly.
Key factors for replacement tank selection include:
- Double-wall construction. This is now a regulatory requirement in many jurisdictions and the standard for responsible fuel storage. Secondary containment provides leak detection capability and environmental protection that single-wall tanks simply cannot match.
- Corrosion protection. Modern systems incorporate cathodic protection, fiberglass-reinforced surfaces, and corrosion-resistant coatings to extend service life well beyond the 20-to-30-year benchmark of older steel tanks.
- Interstitial monitoring. Built-in monitoring of the space between walls enables continuous leak detection without manual inspection.
- Capacity planning. Replacement is an opportunity to right-size your storage based on current and projected demand.
- Compliance alignment. New tanks should meet the latest regulatory requirements in your operating region, whether that is EPA/state standards in the U.S., EN standards in Europe, or applicable local codes elsewhere.
Working with a manufacturer that provides tanks alongside leak detection equipment, piping, and installation support simplifies coordination and reduces the risk of compatibility issues between components. To learn about the lifespan and replacement of underground fuel tanks, please read our article on underground fuel tank lifespan & replacement.
Frequently Asked Questions
How long does underground fuel tank removal take?
A clean residential tank removal typically takes four to eight hours of on-site work. Commercial projects with multiple tanks may require two to five days. If contamination is discovered, the timeline extends by weeks or months depending on the scope of remediation required.
Do I need a permit to remove an underground fuel tank?
Yes, in most jurisdictions. You must notify your state or local environmental agency, typically 30 days in advance. Additional permits from fire departments and building departments may be required. Only licensed UST contractors are authorized to perform removal work.
What happens if contamination is found during removal?
If soil samples exceed state action levels, the project becomes a confirmed release. You must report the release to your regulatory agency. Additional investigation, including groundwater monitoring well installation and expanded soil sampling, determines the extent of contamination. Cleanup costs range from 2,500 for minor issues to over 1 million for extensive plumes.
Can I remove an underground fuel tank myself?
No. Federal and state regulations require that UST removal be performed by licensed, certified contractors. The process involves hazardous materials handling, explosion risk management, and regulated waste disposal. DIY removal risks fines, injuries, and environmental violations.
What is the difference between tank removal and abandonment in place?
Removal physically extracts the tank from the ground, allowing full site assessment and eliminating all underground infrastructure. Abandonment in place leaves the tank underground but fills it with an inert material after cleaning. Removal is preferred for environmental certainty; abandonment is used when physical extraction is impractical. Learn more about tank options in our underground fuel storage tanks guide.
Conclusion
Underground fuel tank removal is a regulated, multi-step process that protects human health, preserves environmental quality, and eliminates long-term financial liability. The core steps remain consistent across projects: assess, permit, empty, clean, inert, excavate, sample, restore, and report.
The decisions you make before decommissioning, particularly around timing and method selection, directly affect cost outcomes. Proactive removal of aging tanks almost always costs less than reactive cleanup after a release. And the decisions you made when the tank was first installed, especially around construction quality and secondary containment, determine how straightforward that eventual removal will be.
If you are planning an underground fuel tank removal, work with licensed contractors who follow API and EPA-approved procedures. And if you need replacement tanks that will serve you reliably through their entire lifecycle, contact our engineering team for certified, double-wall storage solutions built to international safety standards.