Tomas had supervised dozens of commercial builds, so a new two-island forecourt felt routine. The concrete cured on schedule, the dispensers went in over a weekend, and the site looked finished. Then the inspector arrived. One dispenser pad sat slightly out of level, and a product line had been laid with the wrong slope. Neither was a quick fix. Three weeks of rework and a second inspection later, Tomas admitted the truth: fuel dispenser installation is unforgiving of shortcuts.
You probably already sense that. A fuel dispenser is a legal measuring instrument bolted into a hazardous environment, tied to tanks, power, and payment systems. Get the installation wrong and you inherit failed inspections, leaks, downtime, and liability. This guide walks you through the complete process, from choosing the system to final sign-off, so you can plan it correctly the first time.
You will learn how to pick between suction and submersible configurations, what the civil, electrical, and piping work involves, which safety systems are non-negotiable, how commissioning and calibration close the loop, and which codes govern the work in your region. If you are comparing fuel dispensing equipment, the retrofit section at the end will help you decide between a site-built forecourt and a factory-prepared system.
Suction vs. Submersible: Choose the Right Dispenser System

The first decision shapes everything downstream. Fuel can reach the dispenser two ways: a suction system draws fuel up to a pump inside the dispenser cabinet, while a submersible turbine pump (STP) sits inside the tank and pushes fuel to the dispenser.
| Factor | Suction dispenser | Submersible (STP) system |
|---|---|---|
| Pump location | Inside the dispenser cabinet | Inside the underground tank |
| Best for | Simple single or dual-hose layouts, accessible tanks | Multi-dispenser sites, deeper tanks, higher throughput |
| Vapor recovery | Harder to support | Easier to support |
| Noise | Pump noise at the island | Quieter on the island |
| Maintenance | Pump accessible at grade | Pump accessed at the tank |
| Upfront cost | Generally lower | Generally higher |
Priya faced this choice during a retrofit of a four-lane site. Her existing suction dispensers struggled to keep up at peak, and local rules were pushing her toward vapor recovery. Switching to a submersible system lets her run all four lanes cleanly from one tank and meet the new emission requirement. It cost more upfront, but it eliminated the chronic slow-flow complaints that had been driving customers away.
As a rule, choose suction for compact, low-throughput sites with easy tank access. Choose a submersible when you have several dispensers, deeper tanks, or vapor-recovery obligations. For broader selection criteria, see how to choose a fuel dispenser.
Pre-Installation Planning and Site Assessment
Good installations start on paper, not on the pad. Before any digging, confirm the layout, clearances, and permits that govern your site.
- Map dispenser positions, vehicle approach paths, and turning space.
- Confirm setbacks from buildings, property lines, and ignition sources.
- Plan underground storage tank tie-in points and pipe runs.
- Verify electrical supply capacity and panel locations.
- Pull the required permits and confirm the applicable code edition.
This is also the moment to think ahead about integration. If you plan to connect dispensers to a point-of-sale system or a tank gauge, decide the data and conduit pathways now, while trenches are open. Our complete guide to fuel dispensers covers how these components fit together, and planning for smart fuel dispensers is far easier before the concrete is poured.
Planning a new forecourt or a retrofit? A short consultation can flag layout, clearance, and integration issues before they become rework. Request a site assessment and we will help you get the design right the first time.
Civil, Electrical, and Piping Work

This is where most installation errors happen. Break the work into three disciplines and treat each as a checkpoint, not a formality.
Foundation and anchoring
A fuel dispenser mounts to a reinforced concrete pad that must be level and plumb within the manufacturer’s tolerance. Anchor bolts follow the dispenser template exactly, since a few millimeters of misalignment show up as stress on the cabinet and connections. Allow the concrete to cure fully before loading it.
Electrical, grounding, and bonding
Dispensers need dedicated circuits run through appropriate conduit, protected by correctly rated breakers, and often surge protection. Just as important is grounding and bonding. Proper bonding prevents static discharge, which can ignite fuel vapor. In classified areas, wiring methods and fittings must match the hazardous-area rating for that zone.
Fuel piping, slope, and containment
Product lines use materials such as high-density polyethylene, flexible double-wall pipe, or steel, depending on local code and fuel type. Pipes must slope correctly for drainage and sit inside secondary containment where required. Pressure and leak testing come before any fuel enters the system.
Keep these tolerances region- and manufacturer-dependent. Confirm exact values against your dispenser manual and local code rather than assuming a universal number.
Safety Systems and Vapor Recovery
Safety hardware is not optional, and it is far cheaper to install during construction than to retrofit later.
- Shear or impact valves close automatically if a vehicle strikes the dispenser, cutting flow at the base.
- Emergency stop controls let staff shut down the forecourt instantly.
- Breakaway couplings protect the dispenser and hose if a vehicle drives off with the nozzle.
- Leak detection and overfill protection guard the tank and surrounding soil.
- Vapor recovery, whether Stage II or onboard refueling vapor recovery (ORVR), reduces emissions and may be legally required.
Every electrical component inside a vapor zone must also carry the correct hazardous-area certification. If your site requires it, an explosion-proof fuel dispenser and certified wiring keep the installation compliant. Pair the dispenser with automatic tank gauge leak detection so the forecourt can spot a problem early.
Commissioning, Testing, and Calibration
Installation ends when the dispenser is proven, not when it is bolted down. Commissioning turns a collection of parts into a legal, working system.
- Purge and flush the lines to remove debris and air before fueling.
- Pressure test the product lines and confirm no leaks.
- Verify electrical supply, grounding, and safety interlocks.
- Calibrate the meter with a certified prover and confirm accuracy within the legal tolerance, commonly around ±0.5% depending on the region.
- Integrate the dispenser with POS, tank gauge, and any fuel-management software.
- Document every test, setting, and sign-off.
Greg, a commissioning technician, insists the pressure test is the step people most regret skipping. On one site, it revealed a small fitting leak on a single product line. Fixing it took an hour with the system empty. Left undetected, that same leak would have surfaced only after thousands of liters had passed through. Connect the dispenser to a capable fuel management system at this stage so inventory reconciliation works from day one.
For the verification side, follow the intervals in our fuel dispenser calibration guide. Legal-for-trade accuracy is what your inspector will check.
Codes and Standards for Fuel Dispenser Installation

The governing rules differ by region, but they share one goal: a safe, accurate, leak-free forecourt. Know which framework applies before you build.
| Region | Primary codes and standards | Focus |
|---|---|---|
| United States | NFPA 30A, NEC Article 514, PEI RP 100/300/500/1200/1400, API RP 1615 | Dispensing safety, classified-area wiring, installation and testing |
| Europe / International | ATEX, IEC 60079-10, EN 13012 | Zone classification and dispenser construction |
| China | GB 50156 | Station design and safety |
| Manufacturer | Dispenser installation and commissioning manual | Model-specific mounting, wiring, and calibration |
The API RP 1615 overview summarizes underground petroleum storage installation practice, and manufacturer manuals show the level of detail a compliant install demands. Always confirm the current code edition with your local authority.
Not sure which code applies to your project? Our engineers work across North American, European, and Asian frameworks every day. Talk to our technical team and we will map the requirements for your region and fuel type.
Common Fuel Dispenser Installation Mistakes to Avoid
Most rework traces back to a short list of avoidable errors. Check for these before sign-off.
- Out-of-level or out-of-plumb pad, which stresses the cabinet and fittings.
- Incorrect pipe slope, which traps fuel and causes drainage problems.
- Missing or misplaced shear valve, a serious safety and compliance failure.
- Inadequate grounding or bonding, which raises static-ignition risk.
- Skipped pressure or leak test, which hides problems until fuel is in the lines.
- Poor or missing documentation, which complicates inspection and future maintenance.
A disciplined pre-pour and pre-fuel checklist catches nearly all of these. Build the checklist into your project plan rather than treating it as an afterthought. If you need to learn more information, please read our article on Fuel Dispenser Maintenance.
Fuel Dispenser Installation Cost, Retrofit, and Turnkey Options
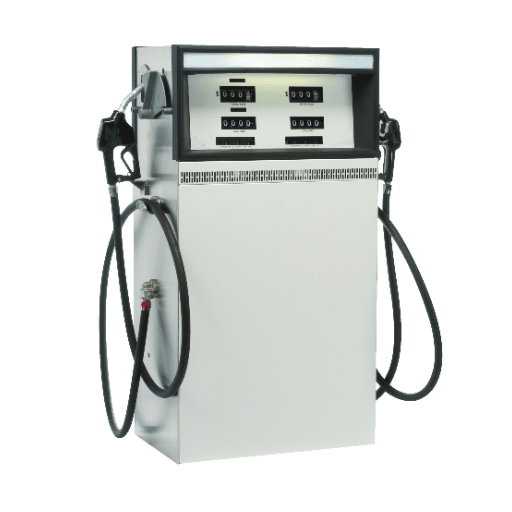
Not every project starts from bare ground. If your existing meters are healthy and the wiring is serviceable, a retrofit can add modern payment, monitoring, or vapor-recovery capability without a full rebuild. Replacement makes more sense when meters are drifting, wiring is outdated, or you want multi-fuel and connected features built in.
There is also a third path. Factory-prepared, pre-commissioned, or skid-mounted systems arrive tested and largely assembled, which cuts field labor and shortens the schedule. David, who manages a fleet depot expansion, chose a pre-commissioned skid unit rather than a fully site-built forecourt. His crew spent days on installation instead of weeks, and the dispenser arrived already calibrated. For compact or remote sites, see our guide to skid-mounted gas station capacity selection.
Whatever route you choose, weigh total cost, not just the unit price. Field labor, downtime, inspection risk, and future maintenance all belong in the calculation.
Frequently Asked Questions
What is the difference between suction and submersible fuel dispensers?
A suction dispenser draws fuel up to a pump inside the cabinet. A submersible system uses a pump inside the tank to push fuel to the dispenser. Submersible suits multi-lane, high-throughput, or vapor-recovery sites; suction suits simple, compact layouts.
What foundation does a fuel dispenser require?
A reinforced concrete pad that is level and plumb within the manufacturer’s tolerance, with anchor bolts set to the dispenser template. Confirm exact dimensions and cure time in the installation manual.
Which codes apply to fuel dispenser installation?
It depends on the region. The United States uses NFPA 30A and NEC Article 514, plus PEI and API recommended practices. Europe and much of the international market use ATEX and IEC 60079-10. China uses GB 50156. Always confirm the current edition locally.
Does a new dispenser need calibration before use?
Yes. Commissioning includes a prover test to confirm accuracy within the legal tolerance, and the dispenser must pass before it is used for trade.
Can a non-specialist install a fuel dispenser?
General civil work may be handled by a contractor, but classified-area wiring, safety systems, and calibration require qualified, often certified, technicians. Regulated forecourt work is not a DIY job.
How long does fuel dispenser installation take?
A single dispenser on a prepared pad can take days, while a full multi-lane forecourt with civil, electrical, and piping work takes weeks. Factory-prepared or skid-mounted systems shorten field time significantly.
Conclusion
A successful fuel dispenser installation comes down to four habits: plan before you build, choose the right system, work to the applicable code, and prove the result through commissioning and calibration. Skip any one of them, and you invite rework, failed inspections, or worse.
Keep these takeaways in view:
- Match suction or submersible to your throughput, tank depth, and vapor-recovery needs.
- Treat foundation, electrical, and piping as separate checkpoints, not a single task.
- Install safety hardware and correct grounding from the start.
- Close the loop with pressure testing, calibration, and documented integration.
At Shandong Shengrui Intelligent Equipment Co., Ltd., we engineer dispensers and turnkey systems built for fast, compliant installation, backed by CAD drawings, 3D assembly guidance, and responsive global support. Request an installation and commissioning consultation, and our team will help you plan, install, and commission a forecourt that passes inspection the first time and runs reliably for years.