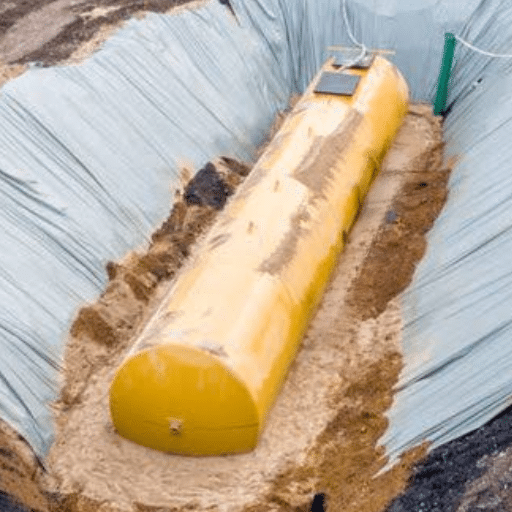
A contractor in Nairobi once backfilled a new 30,000-liter diesel tank with the native clay excavated from the trench. The sticker price for clean backfill seemed unnecessary. Six months later, seasonal groundwater lifted the tank off its bedding, sheared the fill pipe, and caused a release that cost more than the original installation to remediate.
That failure did not start with the tank. It started with the underground fuel tank installation. The excavation, bedding, and backfill decisions made in a few hours determined decades of performance. This guide walks through every phase of underground fuel tank installation, from permits and excavation to backfill, testing, and commissioning, with the measurements and standards you need to avoid the same mistake.
If you are new to USTs, start with our complete guide to underground fuel storage tanks before you plan the install.
Why Installation Quality Determines UST Lifespan

The Cost of a Poor Install
A well-built tank can last 30–50 years. A poorly installed tank can fail in months. The leading causes of premature UST failure- groundwater corrosion, tank flotation, piping fatigue, and settlement- are almost always installation problems, not manufacturing defects.
The cheapest installation quote is rarely the safest. Cutting corners on bedding, anchoring, or backfill creates hidden liabilities that show up during the first flood, the first inspection, or the first leak-detection alarm.
How Installation Links to Compliance
Under EPA 40 CFR Part 280, UST systems must be installed according to a nationally recognized code of practice and the manufacturer’s instructions. That requirement appears simple, but it governs excavation dimensions, burial depth, corrosion protection, leak detection connection, and recordkeeping. A non-compliant install can trigger federal penalties, state enforcement, and denial of insurance coverage.
When to Use a Manufacturer-Supported Installer
For first-time UST projects, environmentally sensitive sites, or international installations, working with the tank manufacturer or a certified representative reduces risk. Manufacturers can supply installation drawings, witness critical tests remotely, and confirm that warranties remain valid after backfill.
At Shandong Shengrui, we ship SF double-wall tanks with CAD drawings, 3D assembly support, and optional on-site supervision so installers follow the same standards in Lagos, Lima, or Lyon.
Pre-Installation Planning and Permitting
Site Assessment and Soil Conditions
Every underground fuel tank installation begins with a site assessment. The installer needs to know:
- Soil type and bearing capacity
- Groundwater level and seasonal variation
- Frost depth in cold climates
- Proximity to buildings, property lines, wells, and utilities
- Traffic loads and burial depth requirements
- Fuel type and required tank capacity
Clay, silt, and organic soils are poor backfill materials and poor indicators of drainage. Rocky or cinder soils can damage tank coatings during backfill. A geotechnical report is not always required, but it is always valuable for sites with questionable soil or high groundwater.
Groundwater and Flood Risk Evaluation
High groundwater is the single biggest risk to a UST installation. An empty tank weighs far less than the water it displaces. Without proper anchoring, a tank can float during excavation, after rainfall, or when the water table rises. Flood risk evaluation should include historical high-water marks, seasonal rainfall patterns, and drainage paths around the excavation.
Required Permits and Regulatory Notifications
Before excavation begins, the project usually needs:
- Local fire department or authority having jurisdiction approval
- Building permit for excavation and restoration
- Environmental agency notification (EPA UST notification form in the U.S.)
- Utility locating and clearance
- Road or traffic control permits if the work affects public access
In many jurisdictions, a qualified installer must sign the installation certification. That signature is the owner’s proof that the work met code.
Selecting the Installer and Code of Practice
Installers should be certified by the tank manufacturer or qualified under a recognized code such as API RP 1615 or PEI RP100. Ask for references, past project photos, and proof of insurance. A qualified installer is not optional; it is a regulatory requirement in most U.S. states and many other countries.
Codes and Standards That Govern UST Installation
API RP 1615 and PEI RP100
API RP 1615, Installation of Underground Petroleum Storage Systems, and PEI RP100, Recommended Practices for Installation of Underground Liquid Storage Systems, are the two most widely referenced UST installation codes. EPA recognizes both as nationally recognized codes of practice under 40 CFR Part 280. They cover excavation, bedding, tank handling, anchoring, backfill, piping, testing, and recordkeeping.
NFPA 30 / NFPA 30A
NFPA 30, the Flammable and Combustible Liquids Code, and NFPA 30A, the Code for Motor Fuel Dispensing Facilities and Repair Garages, address tank siting, venting, spill control, and fire protection. Local fire marshals often enforce these codes during plan review and inspection.
EPA 40 CFR Part 280 Requirements
EPA’s UST rule requires new and replaced UST systems to be installed according to code, with leak detection, spill and overfill protection, corrosion protection, and secondary containment for systems installed after April 11, 2016. Operator training and periodic inspections also begin once the tank goes into service.
UL, EN 12285-1, and GB50156-2021
- UL 58: Steel underground tanks
- UL 1316: Fiberglass-reinforced plastic underground tanks
- UL 1746: External corrosion protection systems for steel USTs
- EN 12285-1: European standard for welded steel underground tanks
- GB50156-2021: Chinese code for gas station design and construction
Specifying a tank with the right certifications for your region is part of the installation planning process, not an afterthought.
For a deeper look at choosing the right tank construction, read our comparison of double wall vs single wall fuel tanks.
Excavation, Bedding, and Tank Placement

Excavation Dimensions and Clearance
The excavation must give workers room to place, level, and inspect the tank. A common rule is at least 24 inches of clearance around the tank shell. Multiple tanks need separation based on manufacturer requirements and local code, often 3 feet or more between shells, plus clearance for piping trenches.
The excavation floor should be flat and free of rocks, debris, and standing water. Side walls must be stable. If the soil cannot hold a vertical cut, the contractor must use shoring, benching, or a wider slope.
Burial Depth Requirements
Burial depth depends on tank diameter, traffic loading, frost depth, and local code. Typical minimums include:
- 24 inches of cover in non-traffic areas
- 36 inches of cover under driveways, roads, or heavy traffic
- Deeper cover in regions with significant frost penetration
Too little cover risks damage from surface loads. Too much cover increases soil load and may complicate future access for maintenance.
Bedding Material and Thickness
The tank must sit on a uniform bed of clean, approved material. Common bedding includes:
- Clean sand
- Pea gravel
- Crushed stone (typically 1/8″ to 3/4″ particle size)
Bedding thickness is usually at least 12 inches after compaction. The bedding layer distributes the tank load, prevents point contact with rocks, and allows drainage around the tank bottom. Native soil, clay, silt, or material with organic content is not acceptable bedding.
Lowering and Leveling the Tank
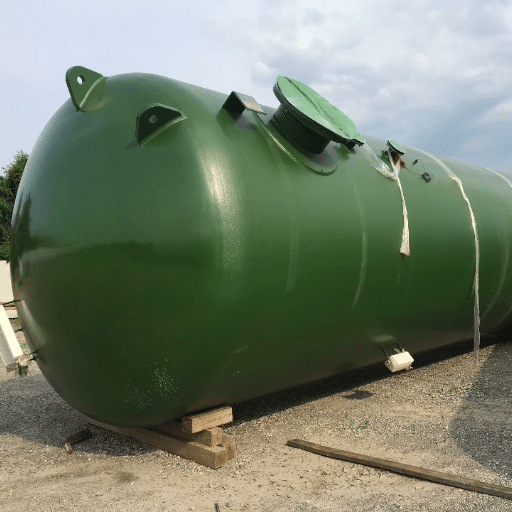
Tanks must be lifted with slings or lifting lugs designed for the purpose. Chains or cables wrapped around the shell can damage coatings. The tank is lowered onto the bedding, checked for level, and adjusted before any piping or anchoring begins.
For double-wall tanks, the installer must protect the outer shell from impact and abrasion. Any coating damage should be repaired before backfill.
Tank Separation and Multiple Tank Layouts
When installing multiple tanks, maintain the manufacturer’s specified spacing. Piping trenches between tanks should allow for inspection and future replacement. Layout drawings should show tank centerlines, piping routes, sumps, and monitoring well locations.
Learn more about steel-fiberglass construction in our SF double wall tank guide.
Anchoring and Anti-Flotation Protection
When Anchoring Is Required
Anchoring is required when groundwater could lift the tank, when the tank is in a flood-prone area, or when local code mandates it. Even a partially filled tank can float if the water table rises high enough. The calculation compares buoyant force to the weight of the tank plus its contents and backfill.
Deadman Anchors and Hold-Down Pads
Common anchoring methods include:
- Reinforced concrete deadmen: Concrete blocks tied to the tank with straps or cables
- Bottom hold-down pads: Reinforced concrete pads poured beneath the tank ends
- Straps over the tank: Steel or synthetic straps secured to deadmen, padded to protect the shell
Anchors must be designed by a qualified engineer and installed before backfill around the tank.
Ballast and Flood-Proofing
In some designs, the tank is partially filled with water or weighted with concrete during construction to resist flotation. This ballast must be removed before fuel delivery, and the tank must be cleaned and dried if water was used.
Straps and Cushioning
All anchoring hardware that contacts the tank must be padded or coated to prevent coating damage and galvanic corrosion. Straps should be tensioned evenly and inspected before backfill.
Piping, Sumps, and Leak Detection Connections
Fill, Vent, and Product Piping
Piping routes from the tank to dispensers, vents, and fill points must follow manufacturer and code requirements. Key practices include:
- Use flexible connections at tank openings where required
- Slope product piping toward sumps for drainage
- Keep piping trenches separate from tank excavation where possible
- Support piping continuously to prevent sagging
For pressurized piping, secondary containment and interstitial monitoring are typically required.
Spill Buckets and Dispenser Sumps
Spill buckets sit at the fill pipe to catch drips during delivery. Dispenser sumps and turbine sumps collect leaks around dispensers and submersible pumps. These sumps must be liquid-tight, properly bedded, and connected to the leak detection system.
Interstitial Monitoring for Double-Wall Tanks
Double-wall tanks require connection of the interstitial space to a monitoring system. Sensors detect liquid or pressure changes between the inner and outer shells. This connection must be made before backfill, and the sensor location must remain accessible.
Automatic Tank Gauge (ATG) Integration
The ATG measures fuel level, temperature, and volume. It also supports leak detection through inventory reconciliation. Install the ATG probe according to manufacturer instructions, verify calibration, and confirm communication with the monitoring console before the first delivery.
For a deeper look at leak detection systems, see our guide to gas station leak detection systems.
Cathodic Protection Installation

Sacrificial Anode Systems
Sacrificial anodes, usually made of magnesium or zinc, corrode instead of the tank. They are simpler than impressed current systems but have a limited design life. Anodes are typically buried near the tank and connected with insulated cables.
Impressed Current Systems
Impressed current cathodic protection (ICCP) uses a rectifier to push protective current through inert anodes. ICCP is used for larger tank systems or sites with high soil corrosivity. It requires periodic inspection of the rectifier and reference electrodes.
Reference Electrodes and Test Stations
Reference electrodes measure tank-to-soil potential to confirm that cathodic protection is working. Test stations provide access points for future measurements without excavation. These must be installed before backfill and marked for future access.
When FRP Outer Shells Eliminate CP
Fiberglass and steel-fiberglass (SF) double-wall tanks do not require cathodic protection for the non-metallic outer shell. However, any exposed metallic fittings, straps, or piping may still need protection. Always follow manufacturer documentation.
Read our full guide on cathodic protection for gas stations for more detail.
Backfilling: Material, Lifts, and Compaction
Approved Backfill Materials
Backfill around a UST must be clean, free-draining, and non-corrosive. Approved materials include:
- Clean sand
- Pea gravel
- Crushed stone within specified particle size
Native soil, clay, silt, rocks larger than the specified size, construction debris, and organic material are prohibited. These materials can damage coatings, trap moisture, create voids, or transmit harmful chemicals to the tank surface.
Placement in Lifts
Backfill is placed in lifts, typically 12 inches (300 mm) at a time. Each lift is leveled and lightly compacted before the next lift is added. This staged placement prevents voids and ensures uniform support around the tank.
Compaction Method and Equipment Restrictions
Heavy compaction equipment should not operate directly over the tank. Use hand tools or light plate compactors near the shell. Over-compaction can deform the tank or damage the outer shell. Follow the manufacturer’s specified compaction density.
Cover Depth and Surface Restoration
After the tank is covered to the required depth, the surface is restored with concrete, asphalt, or soil depending on the location. Tank and piping locations should be marked with permanent survey stakes or as-built drawings to prevent damage during future construction.
Testing and Commissioning
Pre-Backfill Inspections
Before any backfill is placed, an inspector, usually from the fire department, environmental agency, or a third-party certifier, should verify:
- Tank model, serial number, and certifications
- Bedding quality and thickness
- Tank level and alignment
- Anchoring installation
- Piping and sump connections
- Cathodic protection connections
- Interstitial monitoring connections
Do not backfill until these inspections are complete and documented.
Tank Tightness and Hydrostatic Testing
The tank and piping must pass tightness testing. Common methods include:
- Air/soap testing for visible leaks
- Hydrostatic testing with water or fuel-compatible liquid
- Vacuum or pressure monitoring for double-wall interstices
Test pressure, duration, and acceptance criteria come from the manufacturer and the applicable code.
Piping and Interstitial Testing
Piping is pressure-tested to confirm leak-tightness. Double-wall piping and tank interstices are tested to confirm that the secondary containment can hold a release. Any failed test must be repaired and retested before backfill.
Leak Detection System Verification
Sensors, ATG probes, alarms, and monitoring consoles are tested and calibrated. Verify that alarms trigger at the correct setpoints and that operators know how to respond.
Cathodic Protection Field Testing
For steel tanks with cathodic protection, measure tank-to-soil potential immediately after installation. The reading should meet the criteria in NACE SP0169 or the manufacturer’s specification.
Final Inspections and Fuel Delivery Approval
After backfill and surface restoration, a final inspection confirms cover depth, surface condition, and system labeling. The owner receives as-built drawings, test reports, warranties, and operation manuals. Only then should the first fuel delivery be scheduled.
Underground Fuel Tank Installation Cost and Budget Planning

Equipment and Material Costs
Tank cost depends on capacity, material, and certification. A 13,000-gallon fiberglass UST might cost around $40,000 tank-only, while a split-tank package with fittings, sumps, anchoring, freight, and tax can reach $60,000–$65,000. Steel and SF double-wall tanks fall in similar ranges depending on specification.
Civil, Excavation, and Backfill Costs
Excavation cost depends on soil type, depth, dewatering needs, and disposal of spoils. Backfill material can add several thousand dollars if clean stone must be hauled in. Concrete restoration for fuel islands, driveways, and pads is another major cost.
Labor and Contractor Fees
Qualified UST installers charge for tank handling, piping, electrical, testing, and coordination. Complex sites with multiple tanks, tight footprints, or high groundwater require more labor.
Permits, Inspections, and Testing Costs
Permit fees vary by jurisdiction. Third-party inspections, geotechnical reports, cathodic protection testing, and tightness testing add cost but are essential for compliance and warranty.
What Affects Total Cost Most
The biggest cost drivers are:
- Site conditions, especially groundwater and soil quality
- Number and capacity of tanks
- Required secondary containment and leak detection
- Restoration of paved surfaces
- Regional labor rates and regulatory requirements
A typical commercial UST installation can range from $30,000 to $150,000 or more.
For a full cost breakdown including worked examples, read our dedicated guide to underground fuel tank cost and TCO.
Common Installation Mistakes to Avoid
Using Native Soil or Rock as Backfill
Native clay, silt, or rocky spoil is the most common cause of tank settlement, coating damage, and flotation. The short-term savings on backfill material create long-term repair costs.
Insufficient Bedding or Cover
A thin or uneven bedding layer concentrates stress on the tank shell. Too little cover leaves the tank vulnerable to surface loads and frost heave.
Missing Anti-Flotation Design
Installers sometimes skip anchoring when the water table appears low at the time of excavation. Seasonal groundwater changes can still lift the tank months later.
Poor Piping Support and Flexible Connections
Rigid piping without proper support or flexible connections at tank openings will fatigue and crack as the tank settles or as soil shifts.
Skipping Pre-Backfill Testing
Testing after backfill is expensive and disruptive. Pressure tests, tightness tests, and interstitial checks must be completed before the trench is closed.
Inadequate Documentation and Training
Owners need as-built drawings, test reports, warranties, and operator training. Missing documentation delays inspections, complicates maintenance, and can void warranties.
FAQ
How long does underground fuel tank installation take?
A simple single-tank replacement may take a few days once excavation begins. A multi-tank commercial station with paving restoration can take two to four weeks. Weather, permitting, and remediation of unexpected soil conditions can extend the schedule.
How deep does an underground fuel tank need to be?
Minimum cover is typically 24 inches in non-traffic areas and 36 inches under traffic. Local codes and manufacturer instructions may require more. Frost depth and traffic loading are the main variables.
What backfill should be used around a UST?
Use clean sand, pea gravel, or crushed stone within the manufacturer’s specified particle size. Do not use native soil, clay, silt, rocks larger than specified, or organic material.
Do underground fuel tanks need cathodic protection?
Steel tanks and metallic piping generally require cathodic protection unless they are clad, jacketed with FRP, or otherwise protected. Fiberglass and SF double-wall tanks usually do not require cathodic protection for the non-metallic outer shell.
Can a UST be installed in a high groundwater area?
Yes, but the design must include anti-flotation anchoring, dewatering during construction, and possibly a drainage system around the tank. A geotechnical assessment is strongly recommended.
What tests are required after UST installation?
Required tests typically include tank tightness testing, piping pressure testing, interstitial monitoring verification, leak detection system calibration, and cathodic protection potential testing. Local codes may add requirements.
Can I install my own underground fuel tank?
No. Underground fuel tank installation must be performed by qualified installers familiar with local codes, manufacturer requirements, and safety practices. In many jurisdictions, the installer must be certified.
Conclusion
Underground fuel tank installation is not just a construction task; it is the foundation of decades of safe, compliant fuel storage. The right planning, bedding, anchoring, backfill, and testing protect the environment, the owner’s investment, and the installer’s reputation.
Before your next underground fuel tank installation project, review the site conditions, confirm the applicable code of practice, and choose a tank with the certifications your region requires. Look beyond the lowest installation quote and ask how the contractor handles groundwater, backfill, and commissioning documentation.
At Shandong Shengrui Intelligent Equipment Co., Ltd., we manufacture certified SF double-wall tanks and support global projects from shipment through installation. Our team provides CAD drawings, 3D assembly guidance, remote technical support, and on-site supervision to help your crew install the tank right the first time.
Ready to plan your underground fuel tank installation? Contact our engineering team for a site-specific installation checklist, anchoring recommendation, and detailed quote.